- Automating your lighting adds convenience and encourages productive growth with consistenthrs of light
- Timers are also essential for all hydroponic system applications
- It has 1-minut on and offs
- Comes in 15-ampere, 120-volt and 1725-wattage
- Container's measures 8-1/9-inch length by 4-inch width by 3-inch height
- Up to 8 on/off times per day
- Battery backup assures you stay on schedule even after a power outage
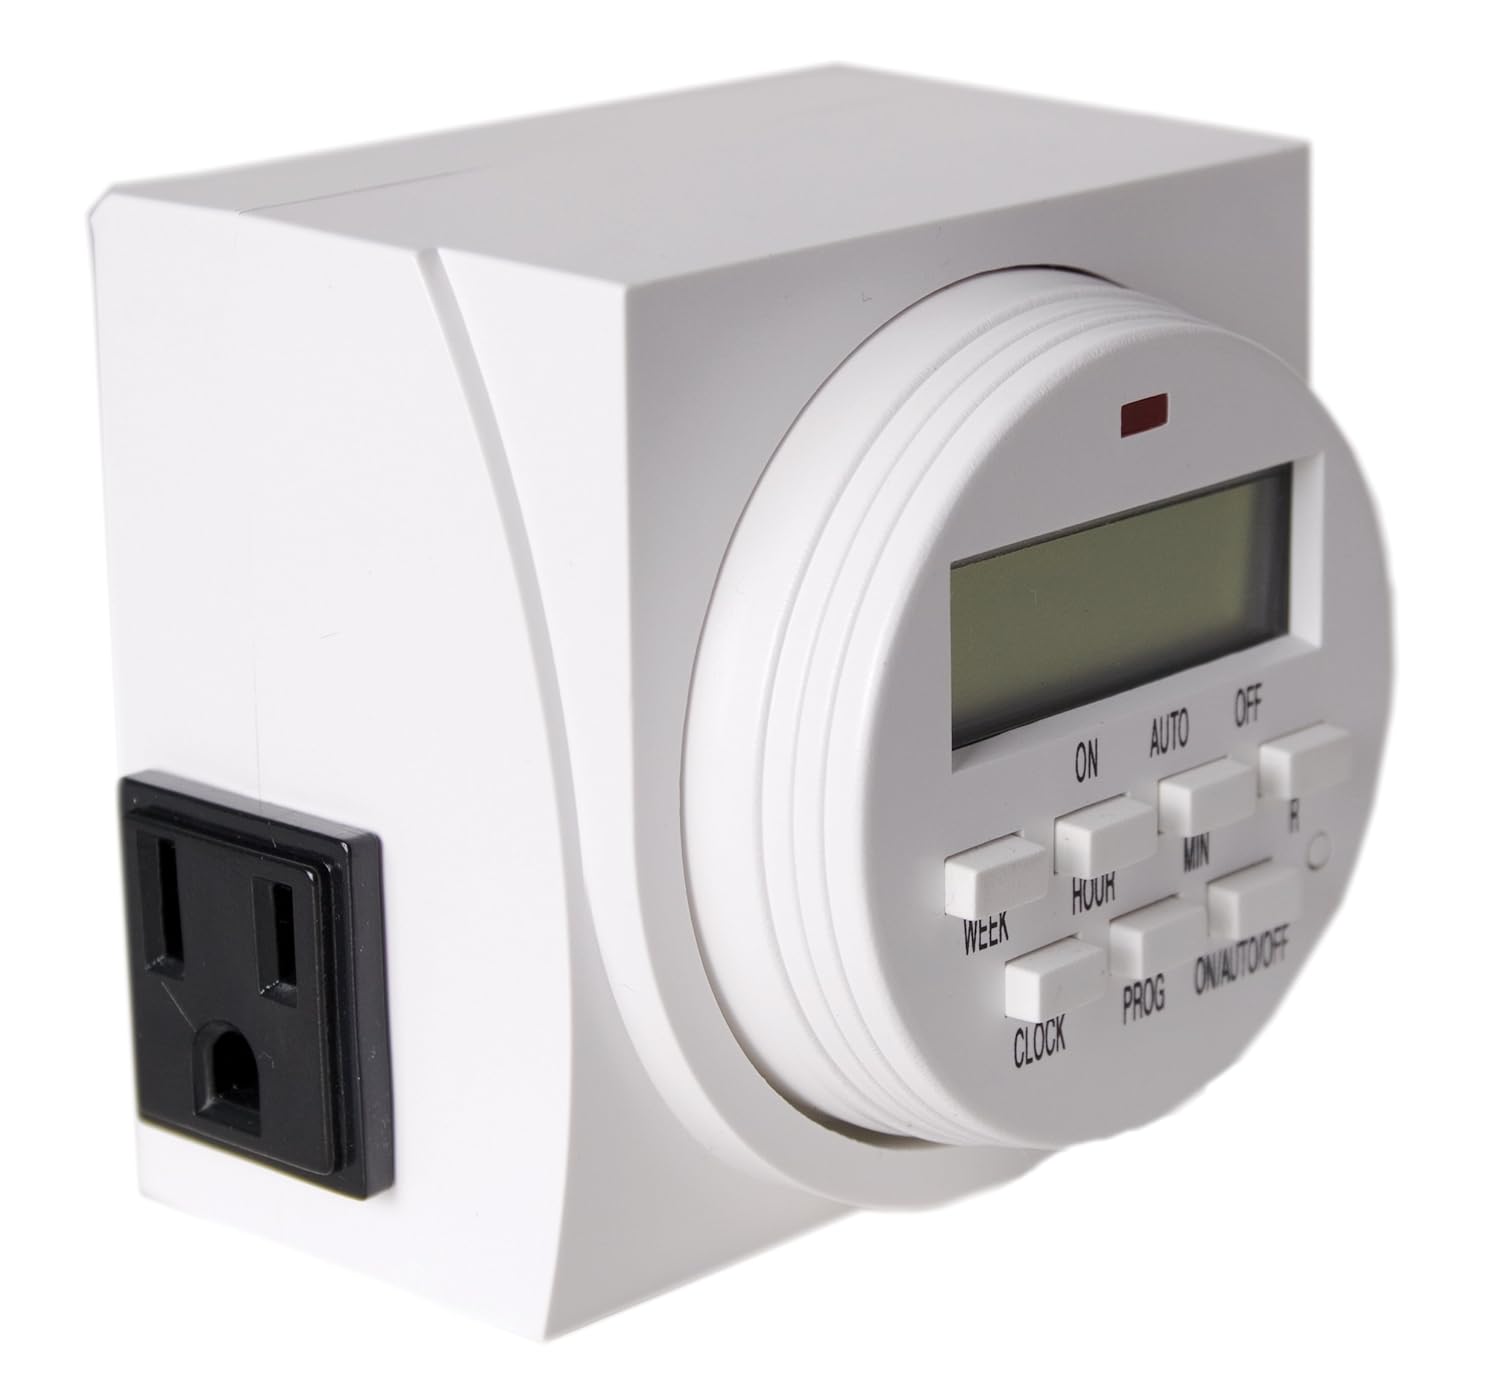
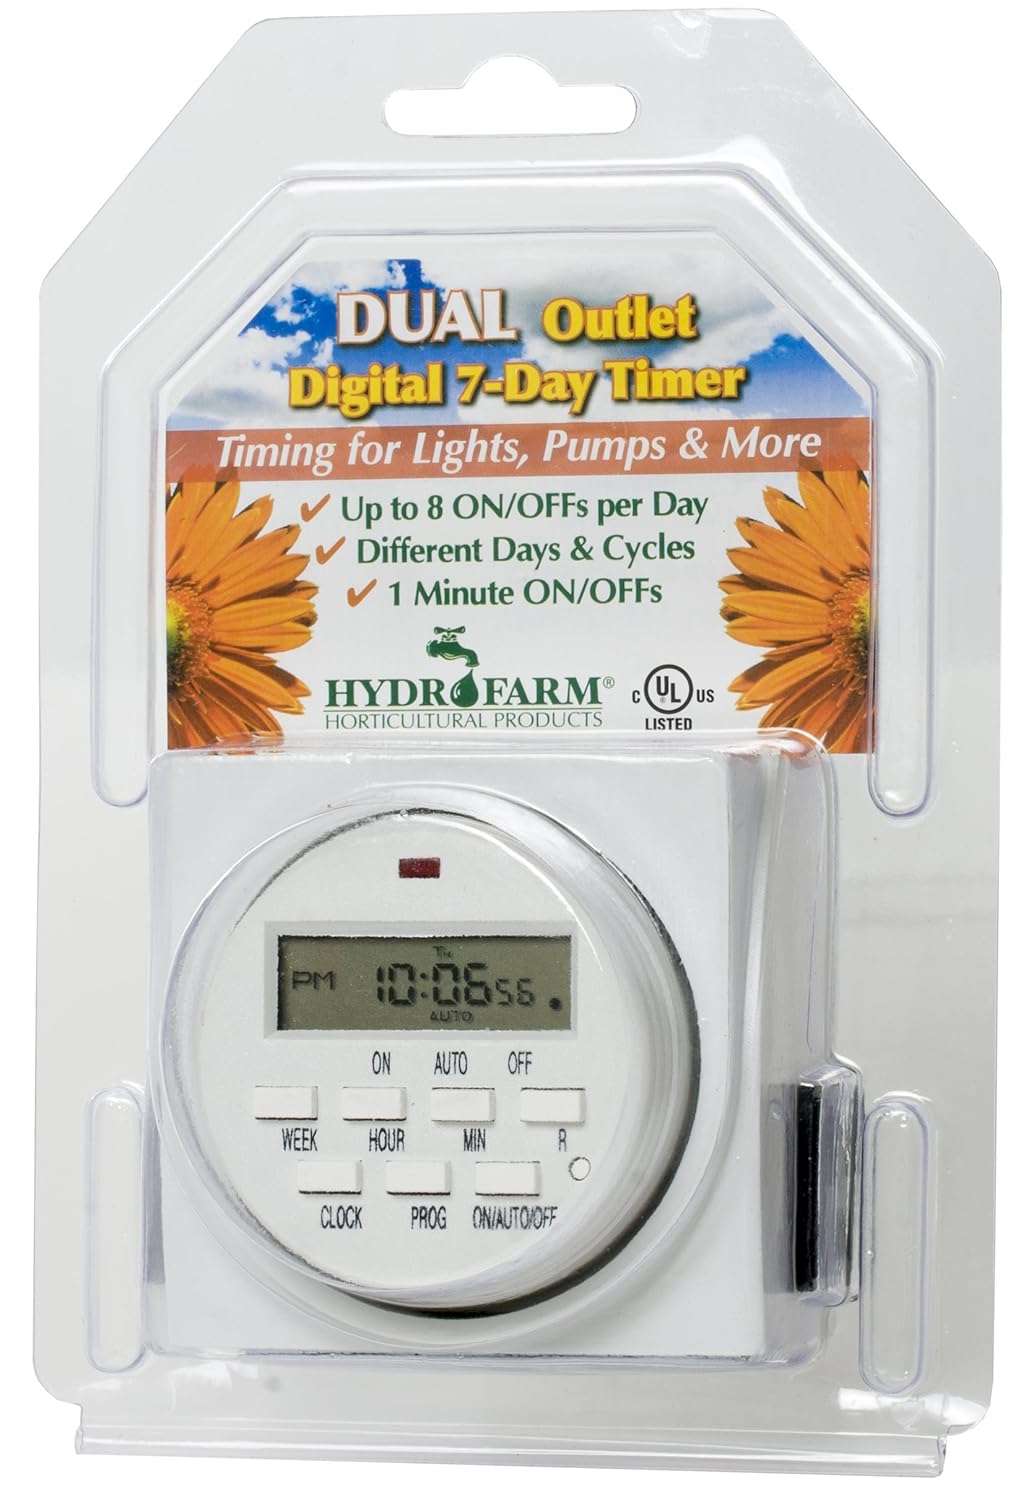
Use Hydrofarm's 7 day Digital Program Timer to water your system every day, every several days, or several times per day! The timer allows up to 8 on/off times per day, a one (1) minute minimum "on" time, and different settings for different days. The timer is a great way to keep everything on track and promote the healthy growth of your plants and flowers. It's three prong grounded, has an LCD digital display for easy operation, includes a battery backup, and has a dual outlet feature so you don't lose a plug. These timers are great for lights or hydroponic systems. Using timers to automate your hydroponic garden adds convenience and encourages productive growth of your plant. Timers allow you to provide a consistent light, nutrient, and airflow program for your garden. The battery backup assures you stay on schedule even after a power outage. Especially useful for orchid and African violet growers.


By D. Musicant
Edit July 16, 2013: It stopped working about 3 months ago. The LCD display and button responses all appear normal but the unit does not pass AC current. The LED that indicates the On condition does not shine. I opened it up, saw no irregularities, put it back together. Ultimately I tossed it and bought the GE 15154 Random On/Off 7-Day Digital Timer here on Amazon, which was only $10.18 and has 20 on/off cycles compared to only 8 for this one. My usage is such that the extra cycles are a big bonus. I am so far pleased with the GE, but my experience tells me that longevity is the issue with these timers.
- - - -
I've only had it an hour but I'm already pleased. I have two Intermatic timers, the DT1 and the DT7, which is similar to this Hydrofarm. I outgrew the DT1, and DT7 fulfilled my needs but the buttons have gotten unresponsive to the point where it's a knock-down-drag-out fight to reprogram it or adjust anything at all, this after having it for maybe 10 years. This Hydrofarm seems to work great. Hopefully, the buttons will remain responsive.
You can set up a schedule with up to 8 separate On events and 8 separate Off events. Each single event can be for all days of the week, any one day of the week, Monday through Friday, Saturday and Sunday, all days but Sunday, Monday Wednesday Friday, Tuesday Thursday Saturday, Monday Tuesday Wednesday, Tuesday Friday Saturday. There's a random mode you can toggle to get from 2 up to 32 minutes of "random" variation.
You can override the settings. For instance, suppose right at this moment the timer when according to the schedule would be Off (meaning no power is supplied to the device plugged into it) and you decide you want it On. There's a button marked ON/AUTO/OFF. The LCD display as you keep pressing that button goes like this: On, Auto, Off, Auto, On, Auto, Off, Auto, On, etc. Thus, if I want it On right now although the programmed schedule has it normally off at this time, I press the ON/AUTO/OFF button and after seeing On in the display I press it one more time so Auto will appear in the display and it will be On and remain On until one of the scheduled events turns it Off, being the schedule taking control again. With my Intermatic DT7 due to the unresponsiveness of the buttons if I wanted to override the schedule I used to have to unplug my device from the timer and plug it into a regular outlet for the time being (if I wanted it On, or leave it unplugged if I wanted it off) and then remember to plug it back into the timer to get back on schedule. Problem solved with my new Hydromatic.
I was concerned when I found out that it has a rechargable battery in it that is not replaceable. The Intermatics each use a single AA alkaline battery, obviously replaceable, to retain settings when you remove the timer from AC power. I contacted Hydrofarm and asked about the installed battery and they contacted the vendor and replied to me by email that the internal battery is NiMH. A review here states that the battery is soldered in. It might be replaceable, I don't know, I haven't removed the 4 screws and looked inside. However, maybe the installed battery will remain good enough for many years, as long as you don't remove the timer from AC power for too long. It shouldn't need much energy to retain information and run for just a few minutes when unplugged.
It comes in a hard plastic bubble pack, but that was a pleasant surprise. I didn't have to use a knife or a scissors to remove it and risk cutting my hands with either a blade or the sharp edge of cut hard plastic. The timer, etc. popped right out with a slight twist. I wish this were more commonly done.
It can deliver a lot of power (15 amps) and the price is quite reasonable. I looked all over for 7 day timers and this one won out easily.
I scanned and used OCR software on the printed instructions (couldn't find them online), did a bit of editing to make it more clear and saved as a text file. Here is my improved version:
- - - -
DIGITAL GROUNDED 7-DAY TIMER
1. Press the reset button. (Do this if you want to erase all settings)
The reset button is the small round white recessed button on the right
side of the timer face. Use a pointed object to reach it in order to
erase all previous programming.
2. Set the clock.
HOUR: Press the clock button and simultaneously press the HOUR button
until you arrive at the correct hour. (Be aware of AM and PM hours.)
MIN: Again pressing the CLOCK button, simultaneously press the MIN
button until you arrive at the correct minute.
WEEK: Press the clock button and simultaneously press the WEEK button
until you arrive at the current day of the week.
3. Program your settings.
Each event is numbered and has a time to come on and a time to go off.
You can set 1, 2, or up to n different events using the PROG (program)
button. The PROG display will start at 1 ON. As you keep pressing the
button, the display will cycle through all the events: 1 ON, 1 OFF; 2
ON, 2 OFF; 3 ON, etc.. up to 8 OFF. For each event you must set WEEK,
HOUR, and MIN. First select which days of the week this particular event
will function (WEEK button.) As you press the button, it will cycle
through all the possibilities which include: MoTuWeThFrSaSu (everyday of
the week); Mo, Tu, We, Th, Fr, Sa, Su (each individual day of the week);
MoTuWeThFr (only week days); SaSu (only weekends); MoTuWeThFrSa; MoWeFr;
TuThSa; MoTuWe; or ThFrSa. After selecting the desired day(s) your event
will function, select the timing for the event to come on or go off
using the HOUR and MIN buttons. (Be aware of AM and PM hours.)
4. Set to automatic.
Use the ON/OFF/AUTO button to set to automatic. The button cycles
through ON, AUTO, OFF, AUTO, ON, AUTO, OFF, AUTO, ON, etc. as you keep
pushing it. If, according to the schedule you have programmed, it is
supposed to be off at that time of day (and day of the week), you cycle
it through to AUTO after cycling past OFF. If, according to the schedule
you have programmed, it is supposed to be on at that time of day, you
cycle it through to AUTO after cycling past ON. If you are using the
timer for subtle equipment like C02 and you want to test your programmed
schedule, you can try plugging in something more obvious like a light or
a fan so that you can see the changes more easily.
NOTE: Daylight Savings mode -- IF you press HOUR and MIN at the same
time you will get Daylight Savings mode which will delay your settings
by one hour automatically. This will be shown as a clock symbol over the
black dot in the right lower corner of the display. Press HOUR and MIN
simultaneously to remove the Daylight Savings mode. Random mode -- If you
press WEEK and MIN simultaneously, the display will show a O above the
clock symbol which will flash when functioning. This is random mode. The
on and off timing will be delayed by 2 up to 32 minutes randomly. This
setting is probably not useful for gardening purposes. One use of this
setting is for lights, to fool would-be burglars when you are not home.
Again press WEEK and MIN simultaneously to remove this mode.
Edit 1: I've had it 60 days now and I'm using almost all of the on/off events and it has been working perfectly.
Edit 2: I can't tell you how aggravating it was trying to reprogram or adjust the time on the Intermatic D7 (mentioned near the beginning of this review) once the buttons became almost totally unresponsive. Lest this Hydrofarm timer suffer the same fate, I've decided to not orient it in such a way that dust can settle into the buttons' crevices (easily managed, because the timer is plugged into a short extension cord), and in addition I have taped a piece of Saran Wrap to the front face. I can see through that and press buttons fine. These tactics will hopefully prevent most dust and dirt from reaching and penetrating the face of the device and will significantly extend its useful life.
Edit 3: One nice feature that's lacking is a backlight for the LCD such as I have with my universal remote control. That remote's LCD lights up for a few seconds when a specific button is pushed, allowing me to read the LCD even in the dark. When I want the timer set on Auto (necessary for the programmed settings to kick in at the appointed times, i.e. on or off), I need to reach for a flashlight and illuminate the screen to make sure that Auto is displayed. It's a minor inconvenience. The timer continues to work well after nearly two years of use.
- - - -
I've only had it an hour but I'm already pleased. I have two Intermatic timers, the DT1 and the DT7, which is similar to this Hydrofarm. I outgrew the DT1, and DT7 fulfilled my needs but the buttons have gotten unresponsive to the point where it's a knock-down-drag-out fight to reprogram it or adjust anything at all, this after having it for maybe 10 years. This Hydrofarm seems to work great. Hopefully, the buttons will remain responsive.
You can set up a schedule with up to 8 separate On events and 8 separate Off events. Each single event can be for all days of the week, any one day of the week, Monday through Friday, Saturday and Sunday, all days but Sunday, Monday Wednesday Friday, Tuesday Thursday Saturday, Monday Tuesday Wednesday, Tuesday Friday Saturday. There's a random mode you can toggle to get from 2 up to 32 minutes of "random" variation.
You can override the settings. For instance, suppose right at this moment the timer when according to the schedule would be Off (meaning no power is supplied to the device plugged into it) and you decide you want it On. There's a button marked ON/AUTO/OFF. The LCD display as you keep pressing that button goes like this: On, Auto, Off, Auto, On, Auto, Off, Auto, On, etc. Thus, if I want it On right now although the programmed schedule has it normally off at this time, I press the ON/AUTO/OFF button and after seeing On in the display I press it one more time so Auto will appear in the display and it will be On and remain On until one of the scheduled events turns it Off, being the schedule taking control again. With my Intermatic DT7 due to the unresponsiveness of the buttons if I wanted to override the schedule I used to have to unplug my device from the timer and plug it into a regular outlet for the time being (if I wanted it On, or leave it unplugged if I wanted it off) and then remember to plug it back into the timer to get back on schedule. Problem solved with my new Hydromatic.
I was concerned when I found out that it has a rechargable battery in it that is not replaceable. The Intermatics each use a single AA alkaline battery, obviously replaceable, to retain settings when you remove the timer from AC power. I contacted Hydrofarm and asked about the installed battery and they contacted the vendor and replied to me by email that the internal battery is NiMH. A review here states that the battery is soldered in. It might be replaceable, I don't know, I haven't removed the 4 screws and looked inside. However, maybe the installed battery will remain good enough for many years, as long as you don't remove the timer from AC power for too long. It shouldn't need much energy to retain information and run for just a few minutes when unplugged.
It comes in a hard plastic bubble pack, but that was a pleasant surprise. I didn't have to use a knife or a scissors to remove it and risk cutting my hands with either a blade or the sharp edge of cut hard plastic. The timer, etc. popped right out with a slight twist. I wish this were more commonly done.
It can deliver a lot of power (15 amps) and the price is quite reasonable. I looked all over for 7 day timers and this one won out easily.
I scanned and used OCR software on the printed instructions (couldn't find them online), did a bit of editing to make it more clear and saved as a text file. Here is my improved version:
- - - -
DIGITAL GROUNDED 7-DAY TIMER
1. Press the reset button. (Do this if you want to erase all settings)
The reset button is the small round white recessed button on the right
side of the timer face. Use a pointed object to reach it in order to
erase all previous programming.
2. Set the clock.
HOUR: Press the clock button and simultaneously press the HOUR button
until you arrive at the correct hour. (Be aware of AM and PM hours.)
MIN: Again pressing the CLOCK button, simultaneously press the MIN
button until you arrive at the correct minute.
WEEK: Press the clock button and simultaneously press the WEEK button
until you arrive at the current day of the week.
3. Program your settings.
Each event is numbered and has a time to come on and a time to go off.
You can set 1, 2, or up to n different events using the PROG (program)
button. The PROG display will start at 1 ON. As you keep pressing the
button, the display will cycle through all the events: 1 ON, 1 OFF; 2
ON, 2 OFF; 3 ON, etc.. up to 8 OFF. For each event you must set WEEK,
HOUR, and MIN. First select which days of the week this particular event
will function (WEEK button.) As you press the button, it will cycle
through all the possibilities which include: MoTuWeThFrSaSu (everyday of
the week); Mo, Tu, We, Th, Fr, Sa, Su (each individual day of the week);
MoTuWeThFr (only week days); SaSu (only weekends); MoTuWeThFrSa; MoWeFr;
TuThSa; MoTuWe; or ThFrSa. After selecting the desired day(s) your event
will function, select the timing for the event to come on or go off
using the HOUR and MIN buttons. (Be aware of AM and PM hours.)
4. Set to automatic.
Use the ON/OFF/AUTO button to set to automatic. The button cycles
through ON, AUTO, OFF, AUTO, ON, AUTO, OFF, AUTO, ON, etc. as you keep
pushing it. If, according to the schedule you have programmed, it is
supposed to be off at that time of day (and day of the week), you cycle
it through to AUTO after cycling past OFF. If, according to the schedule
you have programmed, it is supposed to be on at that time of day, you
cycle it through to AUTO after cycling past ON. If you are using the
timer for subtle equipment like C02 and you want to test your programmed
schedule, you can try plugging in something more obvious like a light or
a fan so that you can see the changes more easily.
NOTE: Daylight Savings mode -- IF you press HOUR and MIN at the same
time you will get Daylight Savings mode which will delay your settings
by one hour automatically. This will be shown as a clock symbol over the
black dot in the right lower corner of the display. Press HOUR and MIN
simultaneously to remove the Daylight Savings mode. Random mode -- If you
press WEEK and MIN simultaneously, the display will show a O above the
clock symbol which will flash when functioning. This is random mode. The
on and off timing will be delayed by 2 up to 32 minutes randomly. This
setting is probably not useful for gardening purposes. One use of this
setting is for lights, to fool would-be burglars when you are not home.
Again press WEEK and MIN simultaneously to remove this mode.
Edit 1: I've had it 60 days now and I'm using almost all of the on/off events and it has been working perfectly.
Edit 2: I can't tell you how aggravating it was trying to reprogram or adjust the time on the Intermatic D7 (mentioned near the beginning of this review) once the buttons became almost totally unresponsive. Lest this Hydrofarm timer suffer the same fate, I've decided to not orient it in such a way that dust can settle into the buttons' crevices (easily managed, because the timer is plugged into a short extension cord), and in addition I have taped a piece of Saran Wrap to the front face. I can see through that and press buttons fine. These tactics will hopefully prevent most dust and dirt from reaching and penetrating the face of the device and will significantly extend its useful life.
Edit 3: One nice feature that's lacking is a backlight for the LCD such as I have with my universal remote control. That remote's LCD lights up for a few seconds when a specific button is pushed, allowing me to read the LCD even in the dark. When I want the timer set on Auto (necessary for the programmed settings to kick in at the appointed times, i.e. on or off), I need to reach for a flashlight and illuminate the screen to make sure that Auto is displayed. It's a minor inconvenience. The timer continues to work well after nearly two years of use.
By Mark
I have been so frustrated with traditional timers, you know, the kind you have to press in individual pins to tell it when to turn or (no wait that for it to turn off, oy). So when my last one died it thought I would opt for this hyrofarm one which I suspect was designed for hydroponic growers so they can change the times throughout the day.
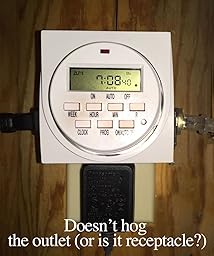
This is a big box but doesn't hog the entire plug, in fact I have a telephone box-type plug sharing an outlet with it now (I'll include a picture).
It arrives with a battery in it and the clock set to the correct time (what??). I reset it just in case and it was easy. Then what makes it kinda intriguing is that you can set it for 8 different times a day to come on and off. So if you work 9 to 5- five days a week you may want it to kick on at 5am until 8am - turn off - There are two receptacles on the unit and both will follow the timer that you set. So you can't have a separate schedule for the other device.
I have mine turning on at 4am (about the time the cat's torment of me to wake up takes hold). When I go to feed them the lights are on until 6am then go off and return on again at 5pm until midnight.
the ONLY con I can think of is that I wish there was a way to have separate programing for each side BUT that's not something the company remotely implies so I can't hold it against them --- BUT if you are a company exec -- think on these things!
By Bruce Johnson
Although these timers are designed as timers for hydroponics they are very good for any type of timer function. They are relatively easy to program, have a backup battery (internal-rechargeable) to keep the timer "on time" in the event of a power failure, and have a higher amp rating than most off the shelf timers I've used.
I use it to start and stop a (small) electric motor, it works like a charm.
The instructions that came with the timer are printed in *very* small text. If you google the timer name and model you can download the PDF manual which is much easier to read.
I've had no problems whatsoever... Buy this if you need a reliable timer for anything.
By Anish Patel
This thing works great... Perfect actually... I'm using like 15 of them at my work to power inefficient Edison bulbs... I was bummed to read they only last a year or two... To be honest I thought being plugged in would charge an internal battery, at least you would think... No.... So reading another review the guy replaced the battery and it comes back to life... Seeing how my entire bar uses them it would be inconvenient to change them as they die... So I opened it, I removed the battery... connected a AA battery holder, filed a small hole on the side used hot glue to glue the holder down, and it works fine. You figure that tiny watch battery last 2 years well a AA probably would last 10 however I'm sure they will start to leak quicker anyways but now I can change the battery quick and just reprogram it after say 5 years... Not a big steal anymore. Why go buy another one... One thing though put hot glue on the metal parts and over the spring and contacts, only because some ac voltage does bleed through to the battery. Running the meter across your talking in the mega ohms... So it can shock if grounded.
By Gene Morin
Does what it's designed for and it is well made. Has pretty much every function you could need and it will not let you down if you program it correctly just remember to double check your settings and you won't be disappointed.
By Anita Hilton
While being a little confusing to get the program right on the first try, it has been working flawlessly for us for some time. We were looking for a way to have the internet turn off during the night, so the kids did not just set up all night talking to their friends via snapchat or text and wanted something that would be able to have different programs set up for during weekdays and weekends. Considering we live in a remote and rural area that does not have cell phone reception on its own we knew a timer to shut things off would ensure no cell phone usage after hours. The kids hate that we have it, but it works very effectively in cutting off the internet at night, even after we have went to sleep. We can even see a difference in our children in the fact that even though they claimed they weren't staying up all night on their phones, they appear much more rested and with less dark circles under their eyes.
By Antuan Rofe
I have done my homework and I'm a research-aholic. I am talking, hours of reviews from consumers, and I'm seriously convinced for the price that this is the BEST TIMER OUT THERE in internet land. Easy set up and consistently a wonderful product. It has been about 4 months or so and it's still ticking.
By Jim
Purchased this for use in an indoor hydroponic system. It's easy to program and you can program up to 8 on/off times and specify how long it stays on for each time. I had actually thought it had more than 8 and turns out I could have used more, but that's my mistake for not reading closer. The only negative I have about the product is that with most timers there is a button where you can press it and turn it on. This one doesn't really have that, but instead has ON / AUTO / OFF buttons but they don't work as I expected where you can push ON to turn it on and then AUTO to put it back into timing mode... at least not the way I understand it. You have to press AUTO until it gets to the right condition of where you want it. Seems more complicated and I've found at times that I'd like to turn it on for a few minutes but don't because I don't want to get it off from the timer cycles. Overall though it seems well made and has been working for 3 or 4 weeks now.
By Chad H
Bought one of these in October of 2015 and have been using it to run the lights for my chameleon cages every since. Works like a charm. Goes on and off exactly how it should, every day. I actually just bought two more of these because I was really liking the units and how they operate, and they are an affordably priced timer. They work way better (in my experience) than those other similar timers that can be found for less than $10 at Walmart or Home Depot. Do yourself a favor and spend the few extra dollars to get this one. It seriously works amazing. They can be used to run light systems, water systems, appliances.... ANYTHING! The timer also has a built-in battery so when the power flickers or goes out, the timer won't lose track of the time, or the on/off sequences. Two outlets on this timer allow you to plug in more than one device, and you could even use a 1-to-3 way adapter on one of the outlets like I do to provide plug-in spaces for devices (or in my case, lights). Just make sure your devices don't overload the timer. It can handle a lot of juice though - 15-ampere, 120-volt and 1725-wattage
Running a few different quad light fixtures on this timer is gravy baby.
Some people said in their reviews that the instructions were hard to understand..... I didn't find them difficult at all. You just gotta read em through and make sure you understand what it is you are reading. If you do have troubles though, then there are a few other reviews here that simplify it a bit more for ya, so go check those out so I don't have to waste my time trying to simplify what I found to be already simple. :-)
So to sum it up, I'm very happy with this timer.
When this thing happens to fail, I will edit my review to tell everyone how long the timer lasted. It seems pretty sturdy and feels pretty solid as it has some weight to it. So I have no doubt that it is built pretty good and will last awhile.
Hope this helped.
By Amazonpenname
I ordered this timer after reading of many people's woes in programming it, but encouraged by the helpful instructions provided by one user. The product arrived with a concise and understandable sheet of instructions in English and French. I can't vouch for the French, but the English made it easy. Easier, in fact than it looked in the already-posted instructions. The process is not simple, because the TIMER is not simple! It can program up to 8 on/off cycles per day. Each of those 8 cycles can be set to work every day, or only one day a week, only weekdays, only weekends, only M/W/F, only T/T/S, or every day but Sunday! The timer can be set to/from daylight savings time with the simultaneous push of two buttons. It can start each cycle exactly as programmed, or it can be in "random" mode with the on/off times shifted randomly up to 30 minutes to help fool burglars. A very impressive machine!
If all you need is a simple timer, you might be better served by another product. If your needs are more complex or you just like clever gadgets, this one should please you.
Warning: it's not tiny. It extends 3.25 inches off the surface of the wall, so may be inconvenient behind a desk or dresser. It fits into the top slot of a standard grounded duplex outlet and leaves the bottom slot clear for another plug. It has two grounded outlets, one on each side. (Suggestion to manufacturer: I'd gladly give up one of those outlets if you could slim it down by an inch.)
I can't report on longevity yet, but I'm going to take the chance and buy a few more.

Comments
Post a Comment